

News
To receive email updates, follow the DoIT group in myUMBC.
Why & How Getting Help is Changing @ UMBC
Posted: April 24, 2024, 1:00 PM
Stacy Cahill '01 Joins UMBC as the New CISO
Posted: April 22, 2024, 9:33 AM
Budget Details now in FADs
Posted: April 10, 2024, 4:33 PM
Deeper Feedback Options & Anon Discussions in Ultra
Improvements to grade calculations with BigFraction update
Posted: March 26, 2024, 12:02 PM

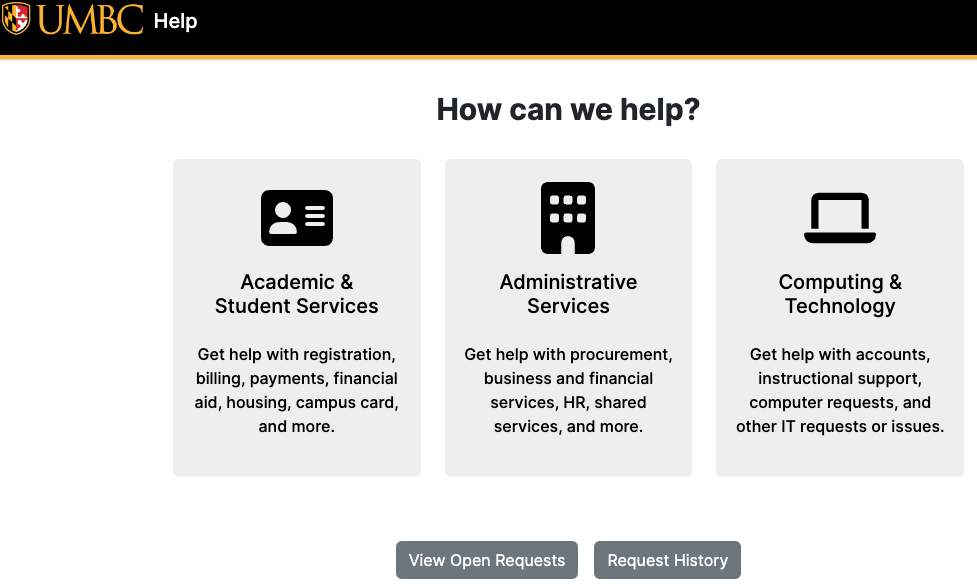
Introducing a New help.umbc.edu Page
Take a look at this new self-service portal!
Posted: March 25, 2024, 10:34 AM
- Go to page 1
- Go to page 2
- Go to page 3
- …
- Go to page 378